In any technical role it is important to strike the balance between getting-things-done-quickly and knowing-all-the-details, and this is especially true when it comes to building computer systems.
You can find lots of different Linux distributions to download, and most have a relatively easy system for adding components or software via some kind of package manager.
However, anyone who is fiddling with Linux is probably doing so because they want to learn more about how their computer works. Dragging-and-dropping packages leaves you with a feeling that you haven’t really learned much.
The balance is wrong: we are getting things done but we really wanted to know more.
Of course, the way to know more is to roll up your sleeves and start building software from source code.
But experience has taught me that it is often much more difficult to build/compile than anyone will admit. Typically the problems come because you have some slightly different settings, or there is some minor file missing which everyone assumes is always there, or any one of a collection of ‘little problems’. An experienced user can circumnavigate these issues easily, but a beginner needs a much straighter path to the destination.
In this post I give a walkthrough of how to set up a Linux system (called Puppy Linux) and how to compile a few important packages (SDL, Tcl/Tk and Python) from source that you can use to write interesting pieces of software (eg games, eg applications with windows and buttons etc.).
The important difference with other ‘setup guides’ is that I have put a lot of effort into thinking how we can be sure that your machine is set up identically to mine, so that your walkthrough experience will be exactly the same as mine when I wrote it.
The first key ingredient
The most important decision I have made for this guide is:
We are not going to install the most cutting-edge, up-to-date, bells-and-whistles distribution of Linux.
We are instead going to install an older but still great distribution, because we know it is not going to be updated ever again.
Updates to your system are the moments when all your installed software can break because someone somewhere has made a subtle change in the way some elements of the system work.
In short:
We do not need the best system out there.
We just need one which doesn’t move!
The second key ingredient
We are going to build our system on a ‘virtual’ computer, using an application called VirtualBox.
The advantages are:
- There is a much better chance that the spec of your virtual machine and mine are identical, so we are minimizing the possibilities that the system I am using for this walkthrough will be substantially different from what you are experiencing as you follow.
- You do not need to risk ruining your PC/Mac with a dual-boot install. No, your Linux system will be running within a window just like any other program.
- With VirtualBox it is very easy to take snapshots of your Linux virtual machine that you can wind back to if any experimental work goes wrong.
VirtualBox is a free-to-use application from Oracle (originally developed by Sun), and can be downloaded from this site here.
I had absolutely no difficulty installing it, so I do not expect anyone to stumble at this point yet. By the way, I am using version 4.2.4 on my MacBook Pro.
You will need to learn a few things about VirtualBox, but nothing is very difficult really and a google will usually put you in touch with help pages.
So, on with the walkthrough!
Download the Puppy 4.3.1 iso image
Here is a link to the iso image for Puppy 4.3.1 on the ibiblio server. Download the file pup-431.iso, but do not write it onto a CD; we do not need to since our virtual machine will read the iso directly.
Set up a Virtual Machine within VirtualBox
Specify the operating system as Linux, and choose ‘Other Linux’ as the type.
You should set up 2 separate HDDs — one which will hold the Puppy filesystem after the install, and one as a compiling space. Just make them the default-chosen .VDI types; mine are 2Gb for the first and 4Gb for the second.
Here is a snapshot of my VirtualBox just after installing Puppy to the first of my HDDs. You can see the second drive there, I will use it for all the bits and bobs created during compiling, and you can also see that the CD drive is empty, since at that point I no longer needed the iso of Puppy in the drive — my VM (virtual machine) boots and load from the HDD. When I took this snapshot I had been experimenting with a few different versions of Linux, you can see them there. I had a couple of VMs set up with Puppy 4.3.1 and was using VM Puppy431e as a test for this walkthrough you are reading now.
Load the Puppy iso into the VM’s CD drive and start up the VM.
Puppy for the first time
Here are the sequence of screens I see when I boot up my VM for the first time, when it loads Puppy from the CD iso:
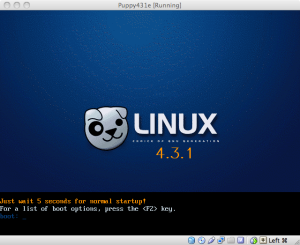
- Opening screen, don’t press anything it will automatically start after a pause
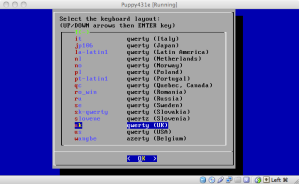
- Choose keyboard layout
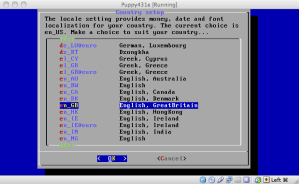
- Choose language
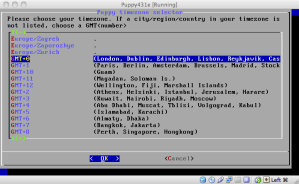
- Choose timezone
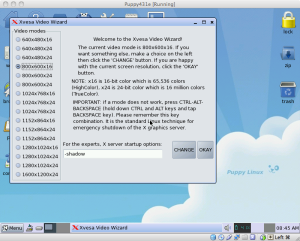
- Choose Xvesa for the video. I use Puppy with the Xvesa option and keep the 800×600 resolution, as everything fits nicely on the Mac screen in a window and I can easily take pictures for this post.

- Click okay to keep 800×600 resolution
- Done! Here is the desktop
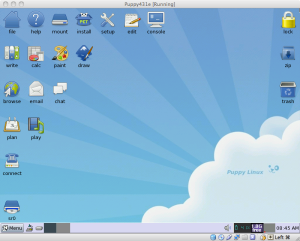
- As you can see the CD drive is recognized (it will be mounted if you left click it). Here is a snapshot of my desktop showing a couple of locations in the file viewer — the ‘home’ folder is
/rootand the lowest-level-possible in the filesystem which is/.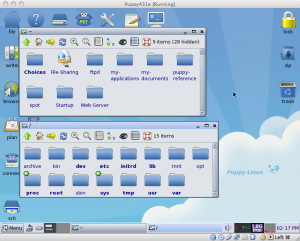
- Notice also that there are not icons for the HDDs you created. They will not appear on the desktop until we create partitions on them with GParted in a moment or two.
When I use my virtual machine I find it better to disable the ‘mouse integration’ in VirtualBox (with CMD+I on my MacBook). In this way when I click in the window my guest system captures the mouse (on a Mac you press CMD to release the mouse from the guest system).
HDD Installation — the Big Picture
The HDD installation process requires you to turn off and on again a few times, and to set the language options a few times, and to not save a few times. The details of all that come below, but so that you can have an impression of what is involved, here is a very quick and detail-free run through the steps of the HDD install — it will help you see the bigger picture of what is going on.
First we boot from the live CD, and you have to choose the localization options like language etc.Then you partition the drives and put the GRUB loader in place on one of your newly-created hard drives.Now you eject the CD, and re-boot without doing any saves. This reboot is just to check that the GRUB menu comes up correctly.Then you turn off the power, put the live disc back in and start the machine up again.You will not see the GRUB menu this time because you are not booting from the HDD yet. You need to choose he language etc options again.Now when puppy starts you are in the CD version, you have got GRUB on the HDD and it is time to do the frugal install.Once you have done that you eject the CD, turn off without saving and reboot again.This time you will be loading up from the HDD install, will have to do the localisation choices again, but never again after that.You will get into puppy and this time it is running from the HDD.Now you turn off and do choose to save this time.When you next turn on you will be running puppy from the HDD and any files you create or any modifications you make will be saved automatically in that pupsave file on the HDD.
HDD installation — with all the details
Well, that was the big picture. Here we go through it all with the full details of every step.
All the sequences are nicely laid out for a Frugal install of Puppy 4.3.1 here.
But before you go there, note my comments on that page too: you need to ‘manage flags’ in GParted and make the partition boot-able, and you should answer ‘no’ whenever it asks you to save the file during the shutdown process (you only choose to save it when you do the first shutdown after booting from the HDD-installed Puppy).
You might also want to have a look at the section below this one, it gives some snapshots of me using GParted on my system.
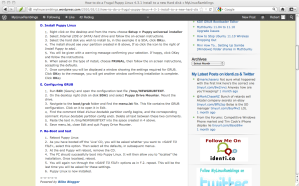
Oh and just in case something on that website changes, here it is in pictures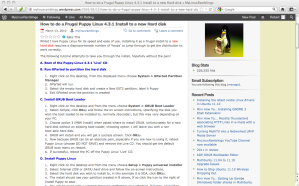
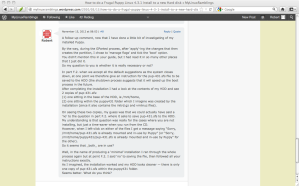 BTW, the official instructions are here but I think they are not as helpful.
At the point where you edit the GRUB file menu.lst, I would suggest un-commenting the time delay so that you will have only a short delay (2 secs is fine); if the line remains commented out then GRUB always waits for a key press before starting up Puppy.
After you have done the install you get a desktop which looks like this (note there is no CD icon because I had ejected the iso in order for the boot to happen from the HDD):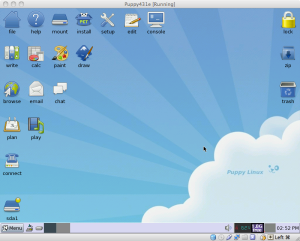
When you now shutdown Puppy you can say ‘yes’ to saving the file. It will put a file pupsave.2fs somewhere on the HDD — for me the defaults chose to put it inside the /puppy431 folder on my sda1 HDD.
Here is a screenshot after that first reboot where I chose to save, you can see the pupsave.2fs file sitting alongside the other Puppy files resulting from the install to HDD (the /mnt/home folder is just what you get if you left-click the sda1 icon on the desktop):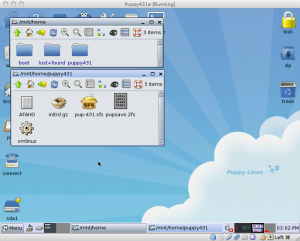
A look at GParted
You will need to use GParted on the both HDDs. Once done you will see an icon for both on the desktop.
Since it might help, here are a few screenshots from me using GParted to partition the first of my two HDDs:
- Create the partition table
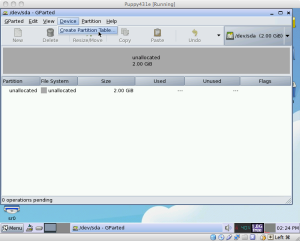
- Create a new partition (right-click on the drive)

- Apply the changes to actually do the creation (right-click on the list of pending operations)
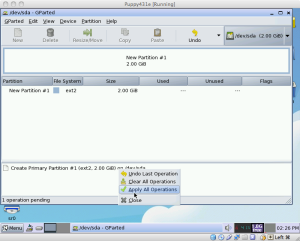
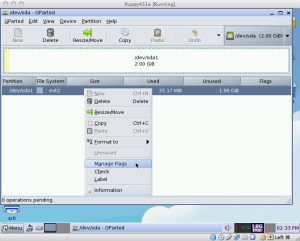
- My sda1 will hold the installed Puppy, so I need to add the ‘boot’ flag. I was initially a bit surprised that it does not now need an ‘apply’ to change the flags, but on reflection I can imagine that changing a flag is really just about ticking a box in some stored lookup table.
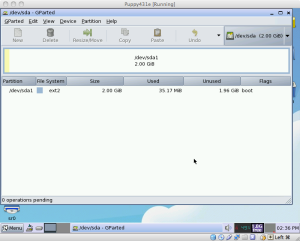
- Here we see the final product: partition with the ‘boot’ flag enabled
- Once GParted is closed, after a short pause the icon for our newly-partitioned HDD appears on the desktop

Augmenting the system so we can compile software
The Puppy Linux system you have installed has plenty of software there already.
But we are aiming to set up a Linux system where we can compile programs, write programs, and basically fiddle with code and suchlike.
The starting point for most of this is to set ourselves up with the famous gcc compiler from the GNU Project.
The reason why Puppy Linux is perfect for this walkthrough is that gcc can be easily installed (it comes along with a few other pieces of ‘development’ software): we just download a file from the Puppy repository.
Installing the GCC compiler
Go back here and download the devx_431.sfs file.
At this point you have downloaded it to your actual real computer (known as the ‘host’ machine in VirtualBox terminology).
We need to get it into our Puppy system (the ‘guest’ system in VirtualBox terminology), so we will simulate saving it onto a CD and then pop it into our VM’s CD drive, so to speak.
Doing it on my Macbook
Open the Mac’s Disk Utility (in Apps->Utilities) and choose a new image.
This will create a drive icon on your desktop; open it and drop the devx_431.sfs file into it.
Then close the file viewer and eject the drive with a right-click on its desktop icon.
Go back into the Disk Utility and select the drive you created; now choose to ‘convert’ it to a DVD/CD master.
At this point we have a file called something like foo.cdr. This is actually an iso already, but the problem is that it is not a universally-compatible iso and Puppy will not be able to read it.
We need to convert the foo.cdr file into a compatible foo.iso. This site here explains how to do this.
Basically we just open up a terminal and use this command:
hdiutil makehybrid -iso -joliet -o foo.cdr foo.iso
Now we have an iso file that Puppy will be able to read, so go back to the VirtualBox Manager and pop it into the CD drive: go to the Storage section and load the iso into the CD drive.
Copying the devx_431.sfs file into Puppy
Copy the devx_431.sfs file onto the HDD at /mnt/home/ — where you see the puppy431 folder which contains vmlinuz and other files.
Do not put it in that puppy431 folder, just alongside it in at /mnt/home/. The BootManager which we are about to use looks only in the /mnt/home/ directory, so you need it in there. Here you go, have a look:
Now open the Boot manager via the Start menu, and within it select that devx file. It will henceforth be loaded automatically on boot up.
Reboot now.
A quick test of the devx files
We are going to check that we can compile a simple C program with the gcc compiler.
Left-click the icon for your second drive, it will mount the drive and open a viewer. (You can also mount a file by a right-click and choosing the mount option, but a left-click does the job too).
Now right-click in that window and choose Window->’Terminal Here’ to open a console with a command line. Alternatively, I could have typed cd /mnt/sdb1 within any console.
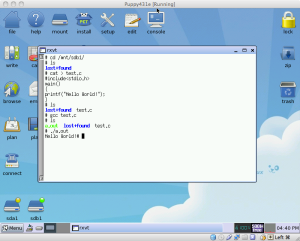
A simple way to create a small file is to use the cat command, so type cat > test.c and then type in the following small program:
#include

main()

{

printf("Hello World!");

}
Use Ctrl+d to exit the cat program and then compile it with gcc test.c.
This should create a file called a.out which you can run with the command ./a.out.
Note that this extra fiddle with the ./ prefix is a safety feature — it prevents you from accidentally running the file a.out, a good thing because it could do all sorts of horrible things.
A pause to look at some general notes on programming in Puppy
There is lots of info within the official Puppy pages, and here is one which describes how to set up puppy for development.
More general instructions on programming in Puppy can be found here.
Here is a quote from that page:
Note, it is necessary that the PC have either a Linux swap partition and/or a lot of RAM. C/C++ compiling needs a lot of temporary space.
It is also recommended that you place the source package (that you want to compile) in a mounted Linux partition, not in /root. This is in the case of running from a live-CD or a frugal install, in which ‘/’ is actually a layered filesystem. A layered filesystem sometimes causes problems with compiling, so it is recommended to mount a hard drive partition for the purpose — a Linux partition, not a DOS/Windows partition!
It was because I read this suggestion that I decided to set up a second HDD for compiling, as we have done above.
It is also worth having a look here at the Puppy School of Programming; there you will findloads of info on different languages.
Building SDL
At this point we have a system where we can compile C programs.
In this section we will build the well-known SDL suite allows you to write games in C, you know: open windows, print sprites, do graphics, play sounds, control joysticks, etc.
Basically it is a collection of libraries which you can link to from your C programs.
We are going to build SDL from the source code and run a few test programs to show that it is working correctly.
Download the file SDL-1.2.14.tar.gz from this page here, which contains a list of all the releases of SDL.
Copy the file SDL-1.2.14.tar.gz into a folder called src created in the second drive (it is just a useful place to store all the compressed source files since we will often eject the CD).
Create another folder called tmp on the second drive. We will run the builds within this folder.
Copy the file SDL-1.2.14.tar.gz into that folder, go there and enter the following commands
tar -xzvf SDL-1.2.14.tar.gz

cd SDL-1.2.14

./configure --prefix=$HOME

make

make install
Credit where credit is due, I got this snippet of commands from here.
Testing SDL
cd into the SDL-1.2.14/test directory. We will now see how to compile the file testsprite.c.
When it comes to compiling programs that use SDL functions, a lot of websites suggest using the gcc command as follows:
gcc `sdl-config --cflags --libs` testsprite.c
but if you try it out you will get a few errors (those are `backquotes` there, not usual ‘quotes’, by the way).
This is because we first need to tell the system where to find the script called sdl-config that this command above is referencing.
The make install created a couple of new directories in /root, here is a snapshot showing these new bin and lib and include directories (and one called share too):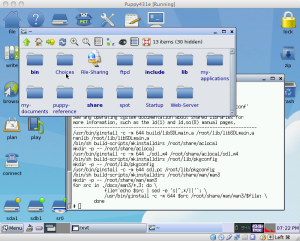
Let me draw your attention to the /root/bin directory, where you will find that file sdl-config, an executable ‘script’ in fact.
You can look at its contents with
more sdl-config
and from within that directory can run it with
./sdl-config --cflags --libs
What is this file doing? Well when we use a command like
gcc `sdl-config --cflags --libs` testsprite.c
you can guess that this effectively wraps up a call to sdl-config which returns a string containing the correctly-setup flags for gcc.
Because we will be running gcc within any of many different directories you need to be able to execute sdl-config from anywhere.
We need to add the /root/bin directory to the PATH environment variable that the Linux system looks through when it tries to find commands. One option is to use the following command each time you open up a new console:
export PATH=$PATH:/root/bin
Do that now and you should be able to compile the test file testsprite.c with
gcc `sdl-config --cflags --libs` testsprite.c
and run it with the ./a.out command to get this
However, the best thing to do is to put that export command in the script ~/bash.rc which is one of the scripts that is executed when a terminal (console) is opened.
It is a hidden file, but you will see it in the file viewer (in the home directory) if you press the eye icon in the ROX file manager. Open it with a click and add that line: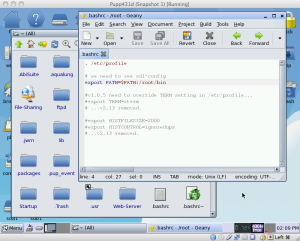
Incidentally, if you want to know a little bit about how gcc looks for files it needs, have a look here.
For those of you interested, here is a wiki on setting up SDL, and here are some instructions on how to test SDL.
A little play with SDL
This post here has a simple example of animation in SDL.
Let’s get it running on our new SDL-enabled system.
Download the file sdlanim.tar.gz, then write it into a CD iso as we showed earlier.
‘Pop that CD into the drive’, in a virtual sense that is, and copy the file in the src directory on the HDD for compiling (/mnt/sdb1/src in my case).
Put another copy in the tmp directory on that drive, go into that directory and unpack with
tar -xzvf sdlanim.tar.gz
This will create a directory called sdlanim; go into that one and type make.
Actually it is worth noting that the Makefile is very simple here — you can see that it just runs the gcc command with that usual `sdl-config' call wrapped up.
You can now run the animation with ./sdlanim.
Use the arrow keys to move the character around that window: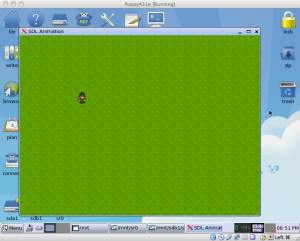 The program itself is simple enough that you can get a feel for how all the pieces fit together. Plus you can have a look at the sprite file:
![]()
More SDL links
Click here for a website which has a good collection of helps on SDL.
Click here for a wiki of documentation and helpful things.
Next destination: Python with Tcl/Tk
Python comes already as part of the development setup of Puppy. Just try typing
python --version
on the command line, and it will tell you that you have version 2.5.1.
One of the things I like about Python is the curses module, which allows you to build programs like on the old-school machines (I started out on a 48K Spectrum).
Have a look here for info on curses, and look here and here and here to see screenshots of the sorts of things you can do with it.
Another package which makes me feel nostalgic for schooldays of programming is the turtle module, which gives turtle-graphics capabilities to Python.
But to be able to use this turtle module, your Python needs to be able to create windows and suchlike, and it will want to do that via another language called Tcl which has a window-stuff-enabled extension called Tk.
The Python that came in the devx_431.sfs file does not have the TK libraries installed, so we are going to do the whole thing ourselves:
- download, build and test Tcl,
- download, build and test the Tk extension to Tcl,
- download and build Python 2.7.
Building Tcl/Tk
Download the file tcl8.5.13-src.tar.gz from here, write it onto a CD iso as usual, and copy it across it into the tmp directory of the HDD we use for compiling.
Unpack the source with
tar -xzvf tcl8.5.13-src.tar.gz
and this creates a directory tcl8.5.13.
Then go into the directory tcl8.5.13/unix and run the commands
./configure --prefix=$HOME

make

make test

make install
Do the same for tk8.5.13-src.tar.gz, running those same commands from the corresponding tk8.5.13/unix directory.
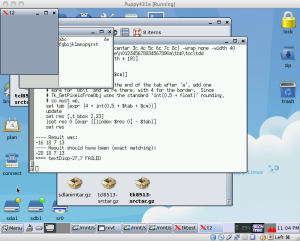
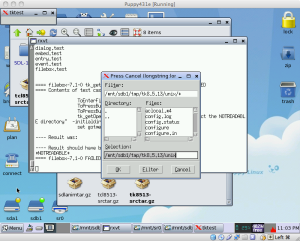
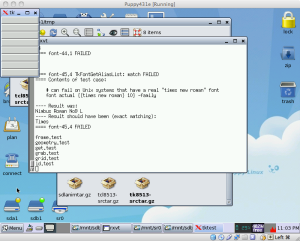
You will get a lot of windows and such appearing during the test process of Tk, here are a few snapshots from mine
A pause to see an example of Tcl/Tk being called from C
As it stands we can use Tcl/Tk from a piece of C code.
So before we move on to the Python install let’s take a moment aside to see this working: we build a C application which has windows that are controlled by Tcl/Tk.
This page here discusses an example of how to put a window interface onto an underlying C program.
Unfortunately there are a few typos in the source listings there (even a couple of missing lines) so use the source below instead. I have put back the missing lines and made a couple of minor changes so that the application wholly fits in my 800×600 display.
There are four source files you need to get into your VM; I suggest putting them in a new directory within your usual HDD for compiling. Note that if you expand the code strips below there is an easy ‘copy to clipboard’ button at the top-right.
child.h
#ifndef _mdw_CHILD_H
#define _mdw_CHILD_H
#include <stdio.h>
#include <sys/types.h>
#include <sys/time.h>
extern int start_child(char *cmd,
        FILE **readpipe, FILE **writepipe);
#endif
child.c
/* child.c */
#include <stdio.h>
#include <unistd.h>
#include <stdlib.h>
#include <sys/time.h>
#include "child.h"
/* Exec the named cmd as a child process, returning
 * two pipes to communicate with the process, and
 * the child's process ID */
int start_child(char *cmd, FILE **readpipe, FILE
        **writepipe) {
   int childpid, pipe1[2], pipe2[2];
   if ((pipe(pipe1) < 0) || (pipe(pipe2) < 0)) {
        perror("pipe"); exit(-1);
}
   if ((childpid = vfork()) < 0) {      perror("fork"); exit(-1);    } else if (childpid > 0) {  /* Parent. */
     close(pipe1[0]); close(pipe2[1]);
     /* Write to child is pipe1[1], read from
      * child is pipe2[0].  */
     *readpipe = fdopen(pipe2[0],"r");
     *writepipe=fdopen(pipe1[1],"w");
     setlinebuf(*writepipe);
     return childpid;
   } else {  /* Child. */
     close(pipe1[1]); close(pipe2[0]);
     /* Read from parent is pipe1[0], write to
      * parent is pipe2[1].  */
     dup2(pipe1[0],0);
     dup2(pipe2[1],1);
     close(pipe1[0]); close(pipe2[1]);
     if (execlp(cmd,cmd,NULL) < 0)
        perror("execlp");
     /* Never returns */
} }
splot.c
/* splot.c */
#include <stdlib.h>
#include <stdio.h>
#include <math.h>
#include <assert.h>
#include "child.h"
#define Z_DIST 400.0
#define SCALE_FACTOR 100.0
/* Factor for degrees to radians */
#define DEG2RAD 0.0174532
typedef struct _point_list {
   float x, y, z;
   int xd, yd;
   int type; /* Color */
   struct _point_list *next;
}  point_list;
static char *colornames[] = { "red",
        "blue", "slateblue", "lightblue",
        "yellow", "orange",
        "gray90"
};
inline void matrix(float *a, float *b,
                float sinr, float cosr) {
        float tma;
        tma = *a;
        *a = (tma * cosr) - (*b * sinr);
        *b = (tma * sinr) + (*b * cosr);
}
void plot_points(FILE *read_from, FILE *write_to,
        point_list *list, char *canvas_name,
        float xr, float yr, float zr,
        float s, int half_x, int half_y) {
point_list *node;
float cx, sx, cy, sy, cz, sz, mz;
float x,y,z;
xr *= DEG2RAD; yr *= DEG2RAD; zr *= DEG2RAD;
s /= SCALE_FACTOR;
cx = cos(xr); sx = sin(xr);
cy = cos(yr); sy = sin(yr);
cz = cos(zr); sz = sin(zr);
for (node = list; node != NULL;
        node = node->next) {
   /* Simple 3D transform with perspective */
   x = (node->x * s); y = (node->y * s);
   z = (node->z * s);
   matrix(&x,&y,sz,cz); matrix(&x,&z,sy,cy);
   matrix(&y,&z,sx,cx);
   mz = Z_DIST - z; if (mz < 3.4e-3) mz = 3.4e-3;    x /= (mz * (1.0/Z_DIST));    y /= (mz * (1.0/Z_DIST));    node->xd = x+half_x; node->yd = y+half_y;
}
/* Erase points */
fprintf(write_to,"%s delete dots\n",canvas_name);
for (node = list; node != NULL;
        node = node->next) {
   /* Send canvas command to wish... create
    * an oval on the canvas for each point. */
   fprintf(write_to,
        "%s create oval %d %d %d %d " \
        "-fill %s -outline %s -tags dots\n",
        canvas_name,(node->xd)-3,(node->yd)-3,
        (node->xd)+3,(node->yd)+3,
        colornames[node->type],
        colornames[node->type]);
}
}
/* Create dataset list given filename to read */
point_list *load_points(char *fname) {
   FILE *fp;
   point_list *thelist = NULL, *node;
   assert (fp = fopen(fname,"r"));
   while (!feof(fp)) {
        assert (node =
            (point_list *)malloc(sizeof(point_list)));
        if (fscanf(fp,"%f %f %f %d",
                &(node->x),&(node->y),&(node->z),
                &(node->type)) == 4) {
            node->next = thelist;
            thelist = node;
        }
}
   fclose(fp);
   return thelist;
}
int main(int argc,char **argv) {
   FILE *read_from, *write_to;
   char result[80], canvas_name[5];
   float xr,yr,zr,s;
   int childpid, half_x, half_y;
   point_list *thelist;
   assert(argc == 2);
   thelist = load_points(argv[1]);
   childpid = start_child("wish8.5",
                &read_from,&write_to);
   /* Tell wish to read the init script */
   fprintf(write_to,"source splot.tcl\n");
   while(1) {
        /* Blocks on read from wish */
        if (fgets(result,80,read_from) <= 0) exit(0);
                /* Exit if wish dies */
        /* Scan the string from wish */
        if ((sscanf(result,"p %s %f %f %f %f %d %d",
                canvas_name,&xr,&yr,&zr,
                &s,&half_x,&half_y)) == 7) {
           plot_points(read_from,write_to,thelist,
           canvas_name, xr,yr,zr,s,half_x,half_y);}
   else {
        fprintf(stderr,"Bad command: %s\n",result); }
   }
   return 1;
}
splot.tcl
# splot.tcl
option add *Width 10
# Called whenever we replot the points
proc replot val {
        puts stdout "p .c [.sf.rxscroll get] \
                           [.sf.ryscroll get] \
                           [.sf.rzscroll get] \
                           [.sf.sscroll get] 200 150"
        flush stdout
}
# Create canvas widget
canvas .c -width 400 -height 300 -bg black
pack .c -side top
# Frame to hold scrollbars
frame   .sf
pack .sf -expand 1 -fill x
# Scrollbars for rotating view. Call replot whenever
# we move them.
scale  .sf.rxscroll -label "X Rotate" -length 400 \
 -from 0 -to 360 -command "replot" -orient horiz
scale   .sf.ryscroll -label "Y Rotate" -length 400 \
 -from 0 -to 360 -command "replot" -orient horiz
scale   .sf.rzscroll -label "Z Rotate" -length 400 \
 -from 0 -to 360 -command "replot" -orient horiz
# Scrollbar for scaling view.
 scale .sf.sscroll -label "Scale" -length 400 \
  -from 1 -to 1000 -command "replot" -orient horiz \
  -showvalue 0
.sf.rxscroll set 333
.sf.ryscroll set 35
.sf.rzscroll set 0
.sf.sscroll set 100

# Pack them into the frame
pack  .sf.rxscroll .sf.ryscroll .sf.rzscroll \
      .sf.sscroll -side top
# Frame for holding buttons
frame .bf
pack    .bf -expand 1 -fill x
# Exit button
button .bf.exit -text "Exit" -command {exit}
# Reset button
button .bf.sreset -text "Reset" -command \
   {.sf.sscroll set 100; .sf.rxscroll set 333;
    .sf.ryscroll set 35; .sf.rzscroll set 0; replot 0}
# Dump postscript
button .bf.psout -text "Dump postscript" -command \
   {.c postscript -colormode gray -file "ps.out"}
# Pack buttons into frame
pack  .bf.exit .bf.sreset .bf.psout -side left \
   -expand 1 -fill x
# Call replot
replot 0
To compile you use (the -O2 is an optimization flag)
gcc -O2 -o splot splot.c child.c -lm
and run it with
./splot cube.dat
where cube.dat is just a text file you need to create that contains:
-50 -50 -50 0
 50 -50 -50 1
-50  50 -50 2
-50 -50  50 3
-50  50  50 4
 50 -50  50 5
 50  50 -50 1
 50  50  50 2
This data file defines a 8 points in three-dimensional space (the fourth number on each row defines a colour). The whole program is a viewer of this data: it is a cube which can be moved around in three dimensions: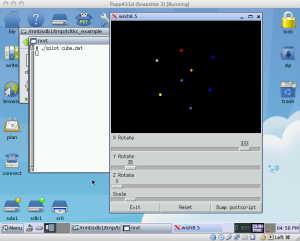
This is already a pretty sophisticated piece of code. Not hugely long, but definitely clever.
The program uses pipes for communication, which are a very powerful feature of Unix-like systems. Some details are here, and here is an introduction.
The C program creates a child process running wish8.5 (which is the Tk interpreter we have just installed, see it in the /root/bin directory) which it connects to with a pipe. The C program carries out perspective calculations and then literally creates the Tcl/Tk command strings that it sends down the pipe and which are picked up and acted on by the wish interpreter.
For example, have a look in splot.tcl to see how the canvas is created in wish and its name is communicated back to the C program which later emits instructions like “canvas_name create oval“.
I like this program: the C is just emitting instructions, it is the wish child process which has created the window and which is drawing onto its canvas.
For further reading, here is a page in the Tcl/Tk wiki which covers three different approaches for GUI-fying a C program.
Ever onward: building Python 2.6.8
At this point we are sure that our C and Tcl/Tk installations are working fine, and will now build Python.
The important issue in this section is to make sure that the gcc build process correctly recognizes that Tcl/Tk is installed in our system, so that it can build the components need for Python to be able to use it (one important file is called _tkinter.py).
Download the Python 2.6.8 source code here, by clicking the link named ‘Gzipped source tar ball’. This will download a file named python-2.6.8.tgz.
Get this file into your virtual machine, and unpack it with the usual
tar -xzvf python-2.6.8.tgz
But before we move on to compiling, we need to update one more environment variable so that gcc will be able to locate the Tcl and Tk installs.
Add this line to your .bashrc file:
export LD_LIBRARY_PATH=$LD_LIBRARY_PATH:/root/lib
Now exit and re-open the command line console (so that the new .bashrc gets read), move into the directory that contains the unpacked Python source code and run the usual commands:
./configure --prefix=$HOME

make

make install
You can now check that everything is working by entering into the Python interpreter with the command
python2.6
and try importing the turtle module with the Python command
import turtle
To exit the interpreter type exit().
Click here or here to see example programs with Python’s turtle graphics.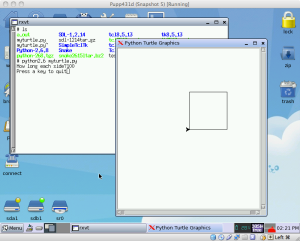
Also, I mentioned the curses module earlier. Have a look here for an implementation of the snake game in Python.
Note that to unpack this tarball you need to use
tar -xjfv snake2615ltar.bz2
To run it, make sure you are in the directory you unpacked that tarball to and type
python2.6 snake26l.py
Here it is in it’s old-school glory: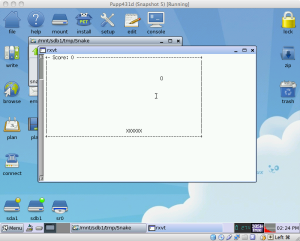
The end
Well that is it for now.
You have a nice system set up and working and can start to play more with C, SDL, Tcl/Tk and Python.
There are plenty of tutorials available on the web, but I hope this walkthrough will have set you up with enough confidence to face building more projects from source.
It is all great – BUT everywhere I go (links from here and various other discussions on puppy linux) there is NO WAY to download the actual ISO file. When I right-click on the ISO link and choose “save link as” it just says source file could not be read.
Do I need FTP to download it?
Anyway I am trying to get it from bittorrent.
Do you know the MD5 hash for the 4.3.1 version you recommend?
I checked the links and they are working fine.
For example, the link to the file pup-431.iso does take me to a directory listing and a left click on that actual file brings up the usual ‘want to save this file’ message.
Try again, that’s the best I can propose.
Thank you for the absolutely super article. Will now more stop by. Greetings from Cologne